| Sogun's Lament | |
| |
| |
| Boss | Asura |
|---|---|
| Maximum Party | 6 |
| Available Modes | {{{modes}}} |
| Cross Server Matching | Yes |
| Recommended AP | N/A |
| Required Level | N/A |
| Recommended Level | N/A |
| Region | Zaiwei |
| Nearest Windstride | Central Garrison |
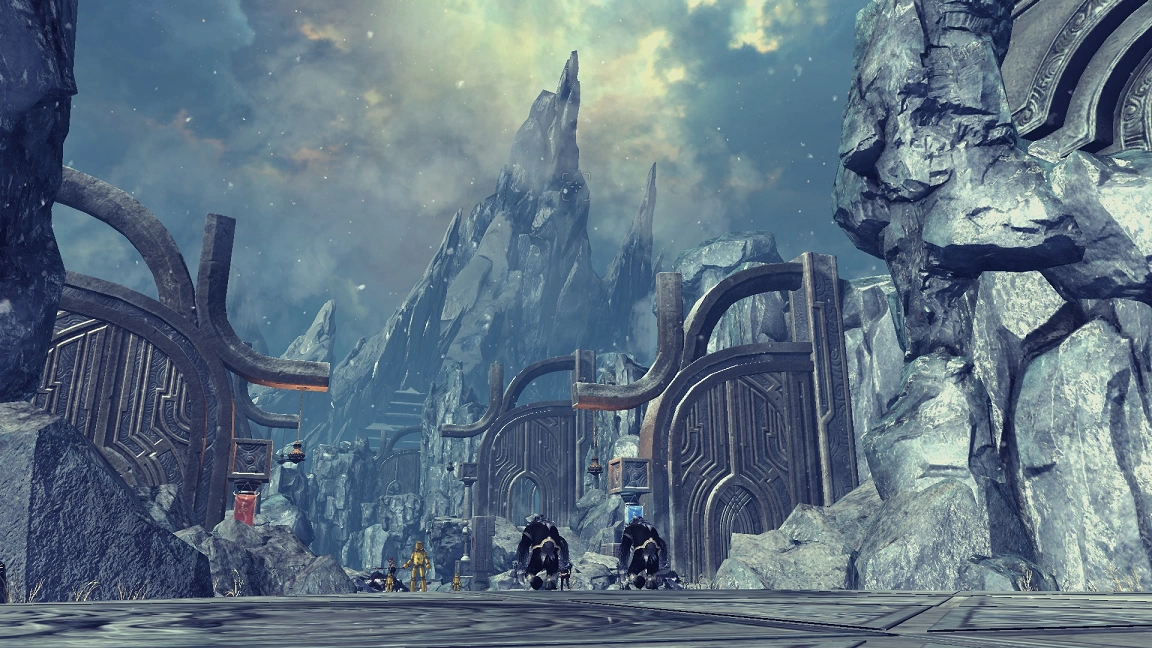
Sogun's Lament is a heroic 6 players dungeon located in Zaiwei.
Overview[ | ]
Sogun's Lament is the hideout of Asura and is currently one of the most difficult dungeons. It's a rather lengthy dungeon and needs several mechanics but comes with a very fine loot table, as well as evolution material for the weapon progress and achievements with titles.
Four bosses have to be fought in this dungeon. All of them can drop Asura Soul Shield Pieces, which have a decent set bonus (AP,crit DMG increase). There are four daily quests and two dynamic quests which can be completed here.
To beat this dungeon the players should prepare by bringing Silverfrost Dungeon Antidotes and either a Python Belt or Oathbreaker Belt or higher (or Hongmoon Imperial Whine).
Achievements and Titles[ | ]
 A Song of Ice and Fire[ | ]
Defeating Asura will be rewarded with the achievement and 10 achievement points and the Title: Master of Ice and Fire
 Toppling the Tormented Tyrant[ | ]
Defeating Asura will be rewarded with the following achievements and achievement points:
| # Asura kills | Achievement name | # points |
|---|---|---|
| 1 | 10 | |
| 10 | 20 | |
| 100 | 30 | |
| 300 | 45 | |
| 1000 | 60 |
Asura's Annihilated[ | ]
Defeating Asura in under 4 minutes will be rewarded with 25 Achievement Points and the Title: The Twisted Fury
Quests[ | ]
The first daily quest ![]() Relieved of Duty can be completed on the way to the first boss by killing 20 guards. The first boss is a pair called Ken and Gen and aren't part of a quest though there are mechanics which help to defeat the pair.
The next daily quest
Relieved of Duty can be completed on the way to the first boss by killing 20 guards. The first boss is a pair called Ken and Gen and aren't part of a quest though there are mechanics which help to defeat the pair.
The next daily quest ![]() Striking the Shadows is again completed on the way towards the second boss Charged Iruga by killing three mini-boss versions of the second boss. The second boss is part of the dynamic quest
Striking the Shadows is again completed on the way towards the second boss Charged Iruga by killing three mini-boss versions of the second boss. The second boss is part of the dynamic quest ![]() Overcharged and needs mechanics to be defeated.
The third boss spawns after killing 4 mini-bosses which happens to be the third daily quest
Overcharged and needs mechanics to be defeated.
The third boss spawns after killing 4 mini-bosses which happens to be the third daily quest ![]() Sogun's Scourge . This boss pair called Volcano and Glacier do not require special mechanics to be defeated and aren't part of other quests.
The last boss Asura awaits in the next room and by defeating him, the daily quest
Sogun's Scourge . This boss pair called Volcano and Glacier do not require special mechanics to be defeated and aren't part of other quests.
The last boss Asura awaits in the next room and by defeating him, the daily quest ![]() Asura's Return and the dynamic quest
Asura's Return and the dynamic quest ![]() Frozen Tears, Flames of Anger are finished.
Frozen Tears, Flames of Anger are finished.
- Relieved of Duty
- Striking the Shadows
- Sogun's Scourge
- Asura's Return
- Overcharged
- Frozen Tears, Flames of Anger
Mechanics[ | ]
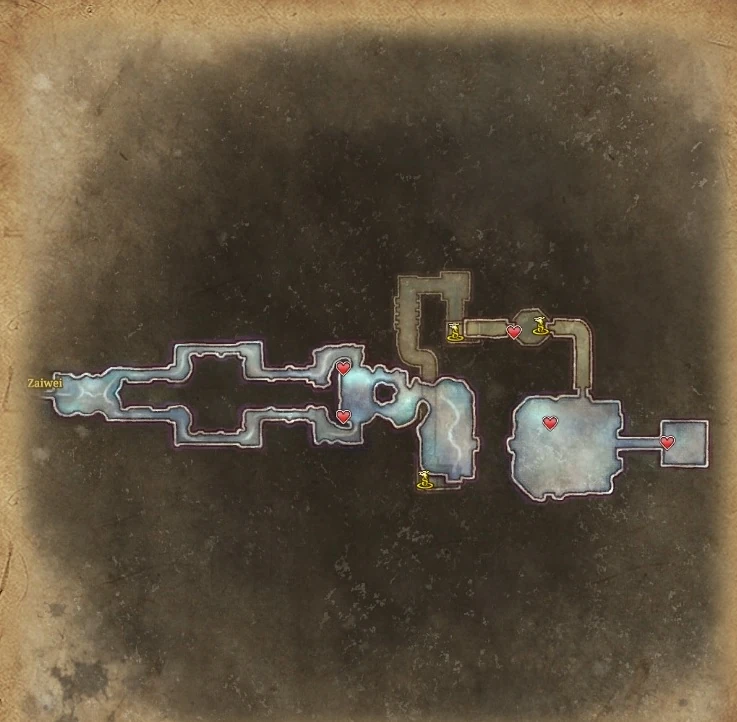
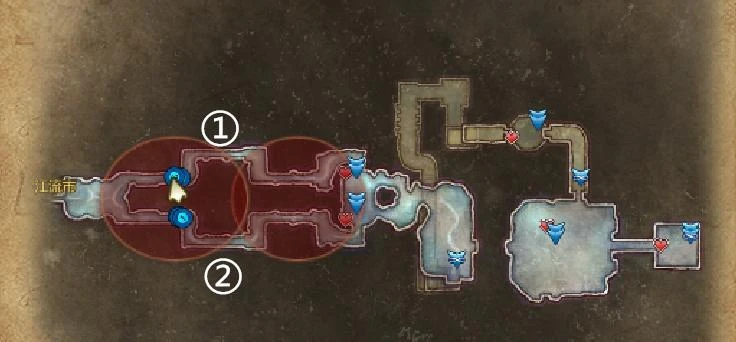
First area[ | ]
First area's double lane map
There are two lanes, each are crowded with mobs, and dummy mini-bosses that need to be killed in order to active the switch. Switches of this lane will open the door of respective doors of another lane, and vice versa.
Players will divide into two group to follow both north and south lanes. If the group has any Assassin, let him solo one lane as he can easy stealth through mobs, while the group focus on clearing mobs in another lane.
Another tip is that if you manage to arrive the the slope without being hit, you can glide down onto any aggroed mobs, resetting them.
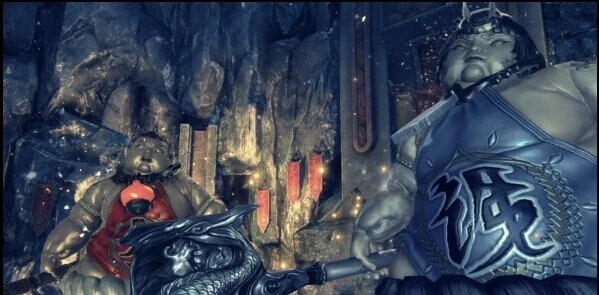
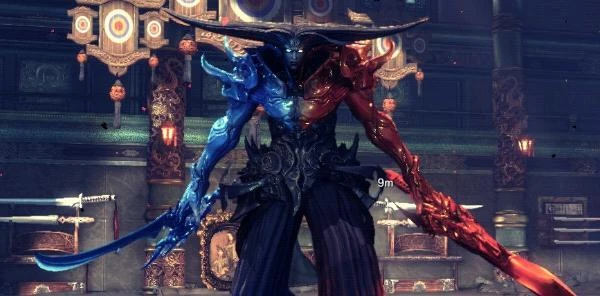
Boss fight: Ken & Gen[ | ]
Ken (left) and Gen (right)
These two bosses are seperated by a river that cannot be crossed once the battle has started unless the players use iframes which protect them from damage the entire time they are on the river. Thus the members of the party should split up before the battle starts.
Ken, the golden boss, will stack himself with an attack buff - Gen, the silver boss, will stack himself with a defence buff in the course of this battle. The players need to keep track of how many stacks of each buff the bosses have. Are four stacks reached the players will get a lot of damage, likely resulting in a wipe.
To prevent this, the bosses will have to be knocked down before the fourth stack is reached. After being knocked down, they will jump to the other side of the river and grab the aggro holder. Once the aggro holder is grabbed the bosses should be CCed so that the aggro holder will not take massive damage (often resulting in death).
The buff stacks should now be reset and the bosses can be damaged as before.
Other Strategies[ | ]
The traditional method mentioned above is nicked as the 3-3, where each three members take on one boss. There are also exists other strategies to take down this boss:
- 3-3 with no Knockdown: it's a normal 3-3 strategy, with exception of no knock down on bosses. Players just keep DPSing bosses, ignoring their buffs until both of they die. The 4-stack buff of bosses will wear out after one minutes, so you need high DPS to do away with the time loss.
- 5-1, or 4-2: where you have one (or two) high DPSer to take on Ken, while the rest are on Gen to bring his HP down to 1 first, where his silver-dust buff becomes useless. When that happens, x2 knockdown Ken so he will jump and pull the tanker to the side with all DPSers, progressing bring him down.
- 6-0: where all of party members focus-fire on Gen, and let Ken jump to Gen's Side on his own. Bring Gen's HP to 1 then focus on Ken, or do both at the same time if you have strong AoE. There is no need to knockdown, but this strategy requires high-DPS party, or it will take at least one-minute longer than traditional method. Moreover, one person who holds no aggro must stand the furthest from them to bait all the throwing attack from the boss, and you must remember to iframe when the buff stacks to 4, or you will receive massive damage.
Tips[ | ]
- The fight makes player suffer from Asura's brand debuff, reducing the healing effectiveness of their skills a lot. It's recommended to bring Awakened Oathbreaker Belt or above, Scorpio Belt, or at least the Hongmoon Imperial Wine to negate the debuff.
- Both Ken and Gen have slow and predictable attack patterns. Even if aggro-holders get the slow debuff, just circle them round and round will be enough to the trick. But not too far away, or they will start to throw jars and do deadly jumping attack.
- If the bosses are rooted, aggro holders should stay behind them, or they will start to throw jars.
- Anti-projectile skills like Petal Storm and Divine Veil will protect caster against Gen's deflecting spin.
- The stream dividing the stage is instant-kill to anyone step in it, so beware of any knockback attacks. You can cross the river, however, provided you use a resist buff (not brief iframe skills) to cross to the middle of the river, then S S to another side.
- If you're knocked into the river and dead, retreat to the entrance and run back. There is no firewall or one-shot orbs. However, remember to run in the lane with boss.
- Both of the boss will throw jars at the furthest player from them. For the first two buff stacks, they will throw at the furthest person at the other lane. At the third buff, however, they will often lose aggro and throw at the furthest person at their own lane instead. Thus, station two members near the walls and furthest from the boss of each side to bait the throw.
- Aside from CC the boss to save the tanker, you can also use party iframe to do the same thing.
- If you're Summoner or Warlock, don't use taunt when boss is needed to knocked down. They will pull your familiar instead, and start to throw jars for a while before jumping back - this is what often causes a wipe. Iframe the pull will also make the boss do the same thing.
Second area[ | ]
A straight-forward path to the boss. You will encounter three Iruga's Shadow, where you need to pick up shields, gained by killing a spawned group of shielded mobs, and reflect his Lightning Spear with the ![]() key to deal massive reflected damage until their death.
key to deal massive reflected damage until their death.
If you have an Assassin your group, you can skip through the normal mobs with his party stealth and flower teleport, but still cannot skip the shadows and his shield-bearing adds.
Boss fight: Charged Iruga[ | ]
Charge Iruga
This boss will spawn 3 adds in different corners of the room. They are either blue or green. Do not try to kill these adds, instead use CCs such as Stun and Knock Down on them. These adds count as bosses and thus need 2 CCs each.
Blue adds have to be double Stunned, while Green adds have to be double Knocked Down to be killed! You have like 10 seconds to kill all three adds before the boss progresses itself to next phase.
Once all three adds are killed, 6 mobs carrying shields will spawn in the center of the room. Kill these quickly, pick up a shield and use the ![]() key to deflect oncoming lightning spears from the boss. Unlike the other Iruga's Shadows, these spears don't cause much damage on the boss themselves.
key to deflect oncoming lightning spears from the boss. Unlike the other Iruga's Shadows, these spears don't cause much damage on the boss themselves.
After he finished throwing 12 spears the tanker should throw his shield on the boss by pressing ![]() , causing gigantic damage well as generating a lot of aggro. Each arrow causes around 150,000 HP, so you can cause a whooping of 1,800,000 HP if you reflects all 12 spears. The boss can now be damaged safely until he spawns the adds again.
, causing gigantic damage well as generating a lot of aggro. Each arrow causes around 150,000 HP, so you can cause a whooping of 1,800,000 HP if you reflects all 12 spears. The boss can now be damaged safely until he spawns the adds again.
Rinse and repeat until his death.
In case if you mess up and the adds still alive, you will have to use anti-projectile skills to protect the party from the spear attacks, then iframe his following his energy ball attack. For a very high DPS group, it's affordable to miss six to twelve spears before it is officially a wipe.
Tips[ | ]
-Unless you have a Warlock, who will eventually use his Soulburn to reset all cooldown during his rotation, you should always save your Stun and Knockdown skills for the adds. You can, however, spam Daze, on the main boss, since you don't use them to CC the adds. For Warlock, they should save their pets after the first Soulburn for the add phase.
-Depend on group's setup and your luck with add colors, you may experience easy and hard time with CCing the adds. A group with two Warlocks will have it somewhat harder to do double knockdown, while two FMs will often breeze it through.
-When taking Iruga, the tanker must not be too far away from the boss, especially during add phase, or it will start to throw stunning bolts and jumping around, messing up the CCing progess. Circling around it is often enough to avoid it attacks.
-During his spear-throwing phase, anti-projectile will help protect members, in case they miss to block a spear.
-Do not mindlessly spam '![]() ', or you will potentially miss a spear. Every four spears, he will stop for a short while, and this is the best time to use '
', or you will potentially miss a spear. Every four spears, he will stop for a short while, and this is the best time to use '![]() '.
'.
-Iruga never throws spear at chi-recovering members, cats and thralls. He always throw at living players, so it is possible to block all of his attacks, even with just only one member alive.
-Throwing shield is the best moment to decide the tanker. The tanker will have to stick close to Iruga during add phases for other players to do the CC, and only move if the other messes up and in need of an extra CCer to do their job. Classes that should throw shields are Blade Master, Kung Fu Master, Warlock (can block, and can root to buy time), and Summoner (can have cat tanking and root).
-If Iruga gets hit by 10-12 spears, he will down for 10s. The lesser amount of spears, the less downtime he suffers. A well-aimed grab/pin will extend the downtime.
Third Area[ | ]
Fight the first mini-boss until she flies up shooting ice beam downward. This is where you can leave her alone and progress to the arena-like stage behind her.
In the arena, you will fight four mini-bosses, before the two main bosses show up.
Boss fight: Volcano & Glacier[ | ]
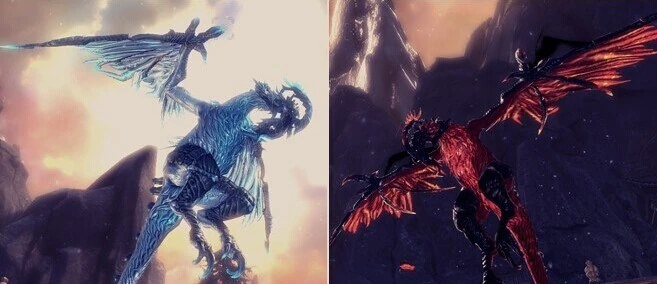
Volcano & Glacier
One of those birds will stay on the air, while other will land and attack. Then they will switch places twice, when the grounded bird reach 90% and 30% HP, respectively.
The flying bird will shoot its AoE feather attack onto nearest target, so it is ideal to use Thrall or a taunting cat to bait the feathers, or have one person wander near the flying bird.
The feather attack of Volcano will also cause an AoE hotspot, so beware to not wander into the area. Sometimes there will be graphical bug that makes the hotspot not appear on screen. Glacier's feather attack only causes Knockdown, but it still hurts. You can use anti-projectile skills against the feather, but remember to avoid the hotspot area.
When the lgrounded bird reaches 30% HP, both of them will land on the ground, with additional attack pattern. Volcano will cause massive AoE damage when it rises its wings, while Glacier will summon slowly-denoting ice landmines.
Their charging attack against aggro-holders who stand too far away is blockable.
Fourth area[ | ]
Straight to the boss room. Memorize where the Dragonblood Coil is located, as you will need that position during the fight.
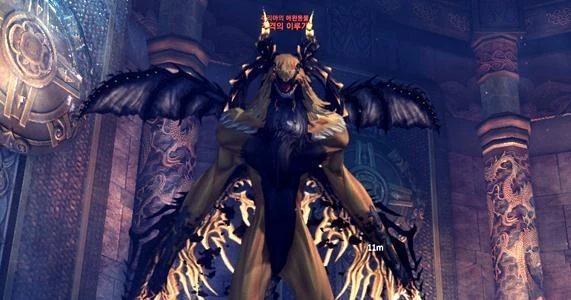
Boss fight: Asura[ | ]
Asura
Asura will cast Asura's Brand on the party which reduced the healing ability by 90%. This can be countered by wearing either a Python Belt or an Oathbreaker Belt or higher (or by consuming Hongmoon Imperial Wine).
The fight starts with a normal dps phase. Depend on your DPS, he may have summon Lifeblooms before the first Fire Phase
+++
Lifebloom Phase
When Asura summons Lifeblooms, poisonous green flowers will appear on the floor which have to be removed by stepping into them. This will snare the player to the floor and poison him (and also regenerate his focus). You can use resist/iframe skills to step on them to negate the root, but the poison still stays. Before or after. Picking the flowers, the players should use a Silverfrost Dungeon Antidote.
At the end of the phase, Asura will do a small-ranged suction to pull anyone who stands too near to him, then knock them back with some damage.
Fail to pick up Lifeblooms will heal Asura 750,000HP per flower. Five stack of Lifebloom absorbed means instant enranged mode. In short, a wipe.
+++
First Fire Phase: When Asura reaches 90% HP
Floating fire swords will appear at Asura's back to indicate the phase. He starts the phase with a large fire aoe circle around him.
The party should meet up at a designated point and stick together, which is in front of the Dragonblood Coil
Asura will cast 8 fire arrows at the party members that deal high damage. The party should be protected by anti-projectile skills from Summoner Force master, Assassins. Always save these skills to protect yourselves from the these arrows. If your group unfortunately has such skills, then spamming block/counter/resist buffs to survive the onslaught.
After these 8 arrows, Asura will spawn 2 Flamefrost orbs and cast them at the closest player of the party.
These orbs have to be blocked/countered/parried, which can be done by all classes, or they deal a lot of damage and slowly bounces around the room until they are blocked. Blocking them will give a strong and stackable AP buff to the party members close by.
The party member who blocked the first orb, recommended to be a ranged class, will get the Watched debuff, and should run in a large circle around Asura, because Asura will throw 5 fire swords which have a big circle aoe around at that person. The other players can dps now.
At the end of the phase, he will do a suction attack to pull all players toward him, and doing a strong kick attack. Iframe/Party Iframe this to prevent unnecessary damage.
If Asura's HP has not yet reached 70% threshold, he will do a Lifebloom Phase
+++
First Ice Phase: When Asura reaches 70% HP
Floating ice swords will appear at Asura's back to indicate the phase.
He starts the phase with 3 barrage of red AoE attacks from above (similar to the Mysterious Man/Hae Mujin attack in Bloodshade/Nightshade Harbor), which are all visible. The swords hurt a lot, if they hit, but they're very slow to executed.
Asura can be damaged in this phase. After that Asura will cast a large ice AoE circle around him.
The party should gather in front of the Dragonblood Coil again. Asura will cast 2 Flamefrost orbs, and unlike Fire Phase, anyone can block it to gain the AP buff.
After that, Asura will cast 8 ice arrows at the party members that deal high damage. Like before the party should be protected with a ranged-attack skills, or spamming block/counter and iframe skills.
At the end of Ice Phase, he will do the same suction and kick attack, like the Fire Phase.
Once again, unless his HP reaches 50%, he will do another Lifebloom Phase
+++
Infinity Fire & Ice Phase:
Once the boss reached 50% HP he will continuously be in either of the two phases.
Additionally, the difficulty will go up, as he will also summon Lifebloom at the same time. You will have to pick it up before Asura does his suction attack, or he will absorb them.
For Fire Phase, it's the best to pick up flower after the Watched orb-blocker start to do his fire-sword kiting.
For Ice Phase, it's during his barrage of Ice swords. Priortizing ones that are furthest from the Dragonblood Coil. If you're slow to return to your group before he shoots his ice arrows, protect yourself with your own anti-projectile and iframe skills.
If you're lucky with the Phase shifts, you will constantly stack up AP-buff.
Tips[ | ]
- Blade Dancer and Destroyer are recommended classes for picking Lifeblooms, as they have root-breaking skills.
- If your party has one Force Master, without any other Force Master, Summoner or Assassin, ask him to trait Divine Veil at the lowest cooldown, or you will have the skill being in cooldown if Asura do more than two Fire Phase back-to-back.
- The Silverfrost Dungeon Antidote when used will not only cure the poison, buff also provide 15s of poison immunity. Use it wisely to step on mutiple flowers.
- The flower gives infinite Focus for first 10 seconds. Some classes may want to make use of this.
- If you step on only one flower, you can save an antidote by using your self-heal and a Healing Tonic. This required you to have Awakedned Oathbreaker Belt or Hongmoon Imperial Wine to gain fully healing effects enough to negate the poison damage.
- Abuse root in order to stall him for extra DPS time. The preferred class is Summoner for having longest root duration.
- During Fire Phase, root Asura before the fourth fire sword launch, and have the tanker/cat's taunt behind the boss.
- During Ice Phse, root Asura before he shoots the eighth ice arrow, provided the tanker/cat can move behind the boss and save himself from the ice-arrows. This is important to achieve the Twisted Fury title.
- Likewise, abuse grab/pin for extra DPS time. Best time to do this is when Asura is at 91%-71%-51%. This is important to achieve the Twisted Fury title.
- If you do it right with root and grab/pin, together with high enough DPS, Asura will not do any Lifebloom Phase during the fight, allowing you to stack AP-buff even higher. This is important to achieve the Twisted Fury title.
Encounters[ | ]
| Bosses | Level | HP | Monsters |
|---|---|---|---|
| Ken | 50 HM3 | 5,947,000 |
|
| Gen | 50 HM3 | 3,173,000 |
|
| Charged Iruga | 50 HM3 | 12,600,000 |
|
| Volcano | 50 HM3 | 1,920,000 |
|
| Glacier | 50 HM3 | 1,800,000 |
|
| Asura | 50 HM3 | 11,210,000 |
|
Loot[ | ]
Asura Loot Table[ | ]
| Asura Soul Shield |
| Asura Ring |
| Asura Necklace |
| Asura Earring |
| Asura Bracelet |
| Asura Belt |
| Mirage Crystal |
| Sovereign Cloak Design |
| Sentry Suit Design |
| Vertigo Eyepatch Design |
| Archer Hairpin Design |
| Stylish Guerilla Bandana Design |
| Frozen Stinger |
| Sealed Naryu Tablet |
| Flower of Lament |
| Petal of Lament |
| Untamed Ghost Pet |
| Untamed Griffin Pet |
| Asura Ember |
| Alpine Weapon |
| Sealed Asura Weapon |
| Black Ice |
| Perpetual Snow |
| Lamentation |
Sogun's Lament King Treasure
| Extravagant Fragment Pouch |
| Stylish Fragment Pouch |
| Gem Hammer |
| Naryu Tablet |
| Sealed Alpine Weapon |
| Legendary Gem Hammer |
| Locked Asura Weapon Chest |
| Petal of Lament |
| Sealed Flower of Lament |
Iruga Treasure
| Extravagant Fragment Pouch |
| Stylish Fragment Pouch |
| Gem Hammer |
| Naryu Tablet |
| Sealed Alpine Weapon |
| Locked Asura Weapon Chest |
Gallery[ | ]
| Sogun's Lament Guide |
|---|