| Sundered Nexus | |
| |
| |
| Boss | Be Ido |
|---|---|
| Maximum Party | 6/4 |
| Available Modes | {{{modes}}} |
| Cross Server Matching | Yes |
| Recommended AP | N/A |
| Required Level | N/A |
| Recommended Level | N/A |
| Region | Zaiwei |
| Nearest Windstride | Central Garrison |
Sundered Nexus is a heroic 6 or 4 players dungeon located in Zaiwei.
Overview[ | ]
The Sundered Nexus is the hideout of Be Ido, after he had fled the Naryu Labyrinth. With a new set of skills, as well as new comrades to fight for him, Be Ido is now the final boss of the Sundered Nexus. He has to be fought in three separate stages to finish the quest Be Ido Rides Again and obtain 9200 XP, 3 gold 29 silver 50 copper, a Reclaimed Secret Technique, a Frozen Stinger and a Sundered Nexus Reward Chest. The dynamic quest Ghost of the Machine rewards the Expired Be Ido 6/4-Member Treasure.
Sundered Nexus is split into two parts, with one mini-boss at the beginning and at the end of the first part respectively. Both of them have specific mechanics that help beat the boss. The second mini-boss is part of the quest called The Gatecrasher rewarding 9300 XP, 64 silver and a Sundered Nexus Reward Chest. The corresponding dynamic quest is called Ghost of the Machine. The quest rewards are 2000 XP and a Lost Operator 6/4-Member Treasure.
Similar to the Naryu Labyrinth which had the Naryu Relic Piece which could be used to create a chest containing special items, there's a similar item dropping in Sundered Nexus which can be used the same way. Ten of the so called Sundered Nexus Pieces can be used to create a Sundered Nexus Chest which can contain special loot like 100 Honorary Ornaments.
The dungeon is kind of dynamic, similar to the Naryu Labyrinth. The path taken through the dungeon varies every run. Depending on which doors open at random, different paths with different mobs/mini-bosses and thus different mechanics will be revealed. If one is (un)lucky enough to finish the longest path, the achievement ![]() A Room Full of Doom is obtained which rewards 10 Achievement Points.
A Room Full of Doom is obtained which rewards 10 Achievement Points.
Mini-Rooms[ | ]
There are small rooms scattered throughout Nexus, each with its own mechanic to advance to the next room (like Naryu Labryinth). Not every room will be covered due to some of them having a random chance to open but the following rooms will include all of the ones you may encounter if you take the shorter path at the Key Roulette Room (and a few extras).
Chief Investigator[ | ]
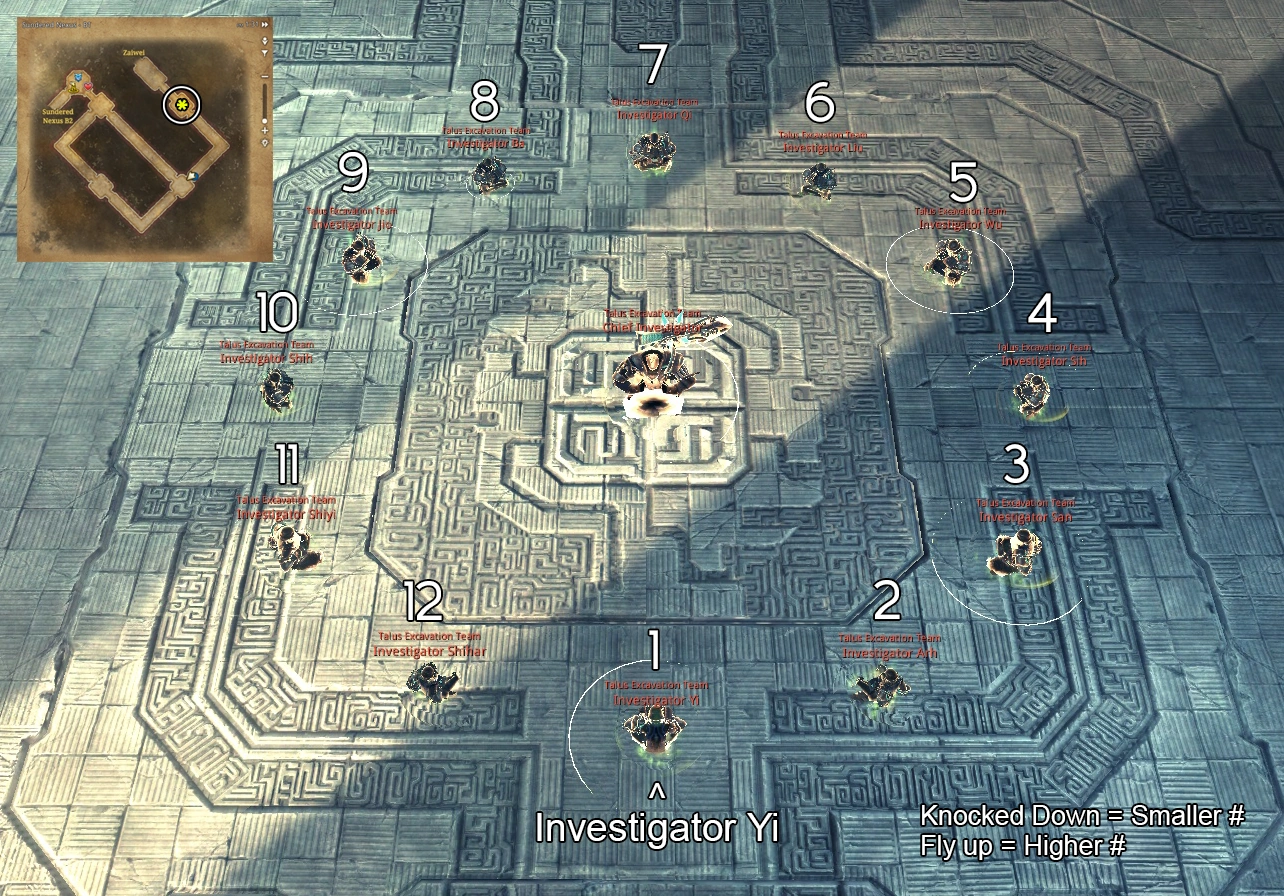
This first mini-boss awaits the Player in the very first room of the dungeon. One Player has to pick a bomb and throw it on one out of 12 of the Investigator XY meditating around the main mini-boss. If the bomb was thrown at the correct mob, the mini-boss will awaken and can be killed easily. If the bomb was thrown at a wrong mob, this mob has to be killed and the bomb can be thrown again. With every time the bomb is thrown at a wrong target, the main boss will have more HP in the final battle. The correct mob is selected at random for each run but there is a mechanic to determine the right one. If a mob flies into the air when a bomb is thrown at him, the number is higher. If he is knocked down, the number is smaller. A guaranteed way to finish this room within 5 bomb hits is to start at 1, then skip to 7 to determine the side the correct mob is on. Depending on 7's result, choose 10 if the number is higher or 4 if the number is lower. This way you'll only have 2 mobs to choose between at the very end (assuming you don't get lucky).
*Side note: If you understand simple Chinese, the Investigators are numbered 1-12 in Chinese Pinyin but some of them are spelled wrongly.
Bull Room[ | ]

Bull Room
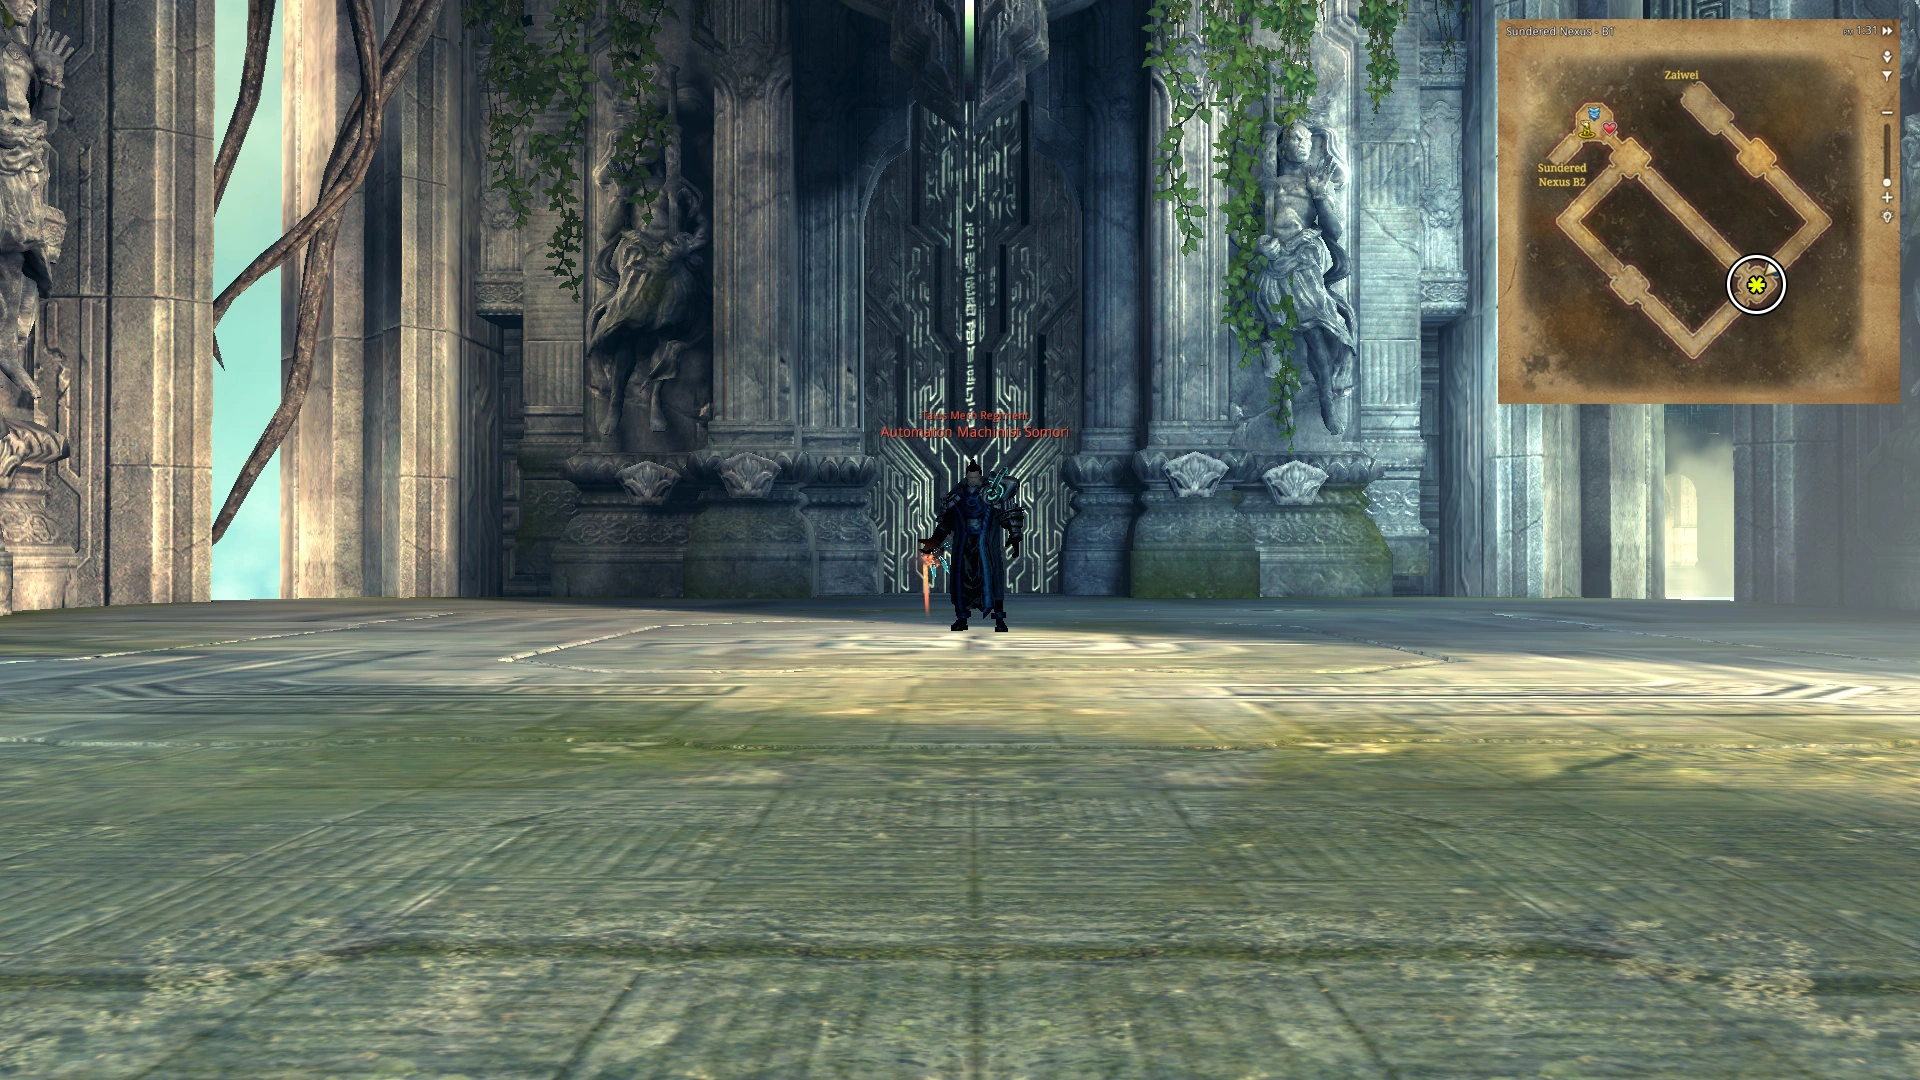
This is the second room that the party will encounter. The Automaton Machinist Somori acts similar to the mini-boss in Naryu who drains your Chi. He does ranged projectile attacks and a Chi drain wave. The Chi drain will be noticeable when he raises his arm up into the air and holds it for a few seconds. You can avoid the wave via iframes or resist skills (however HM block does not work). After a few attacks, Somori will say, "Take care of this warrior!". This signifies the spawning of 2 bulls on either side of him. Blue dummies shouting, "Go away!" will also spawn around the area which a Ranged should destroy. Upon destroying the dummies, they will change to Red dummies which will attract the Bulls to charge them rather than attacking Somori where most of the party will be.
After killing him, either one of the two gateways will open. One is a short path and the other is a long path. The long path has Vipercaps along the way which will drag you towards them (similar to Yeti Vipercaps). After the Vipercaps, there will be a trap room like the one in Naryu Labyrinth - only one of the pillars will open the door and it is chosen at random. One more Vipercap pathway lies ahead till the maze room. The short path has Lion Statues shooting fire which you can fly over.
Maze Room(s)[ | ]
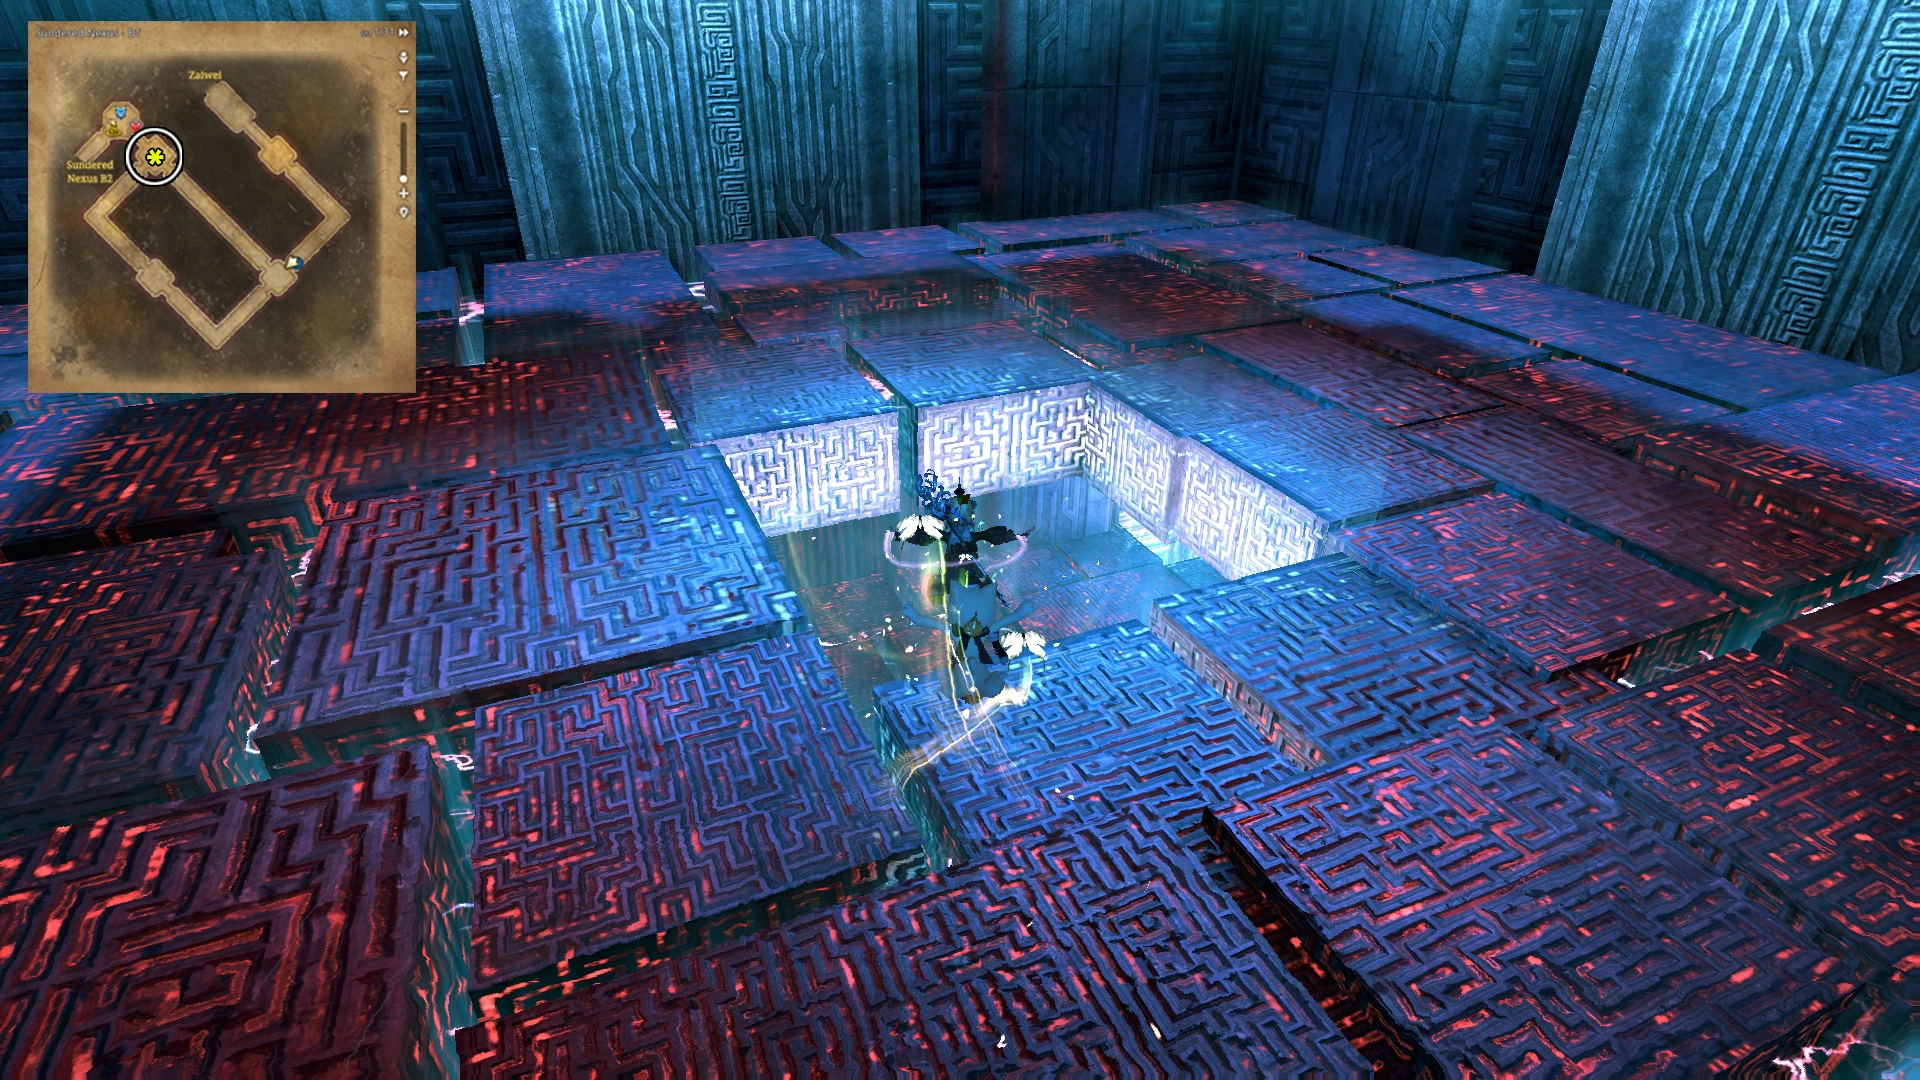
Nexus Maze Room
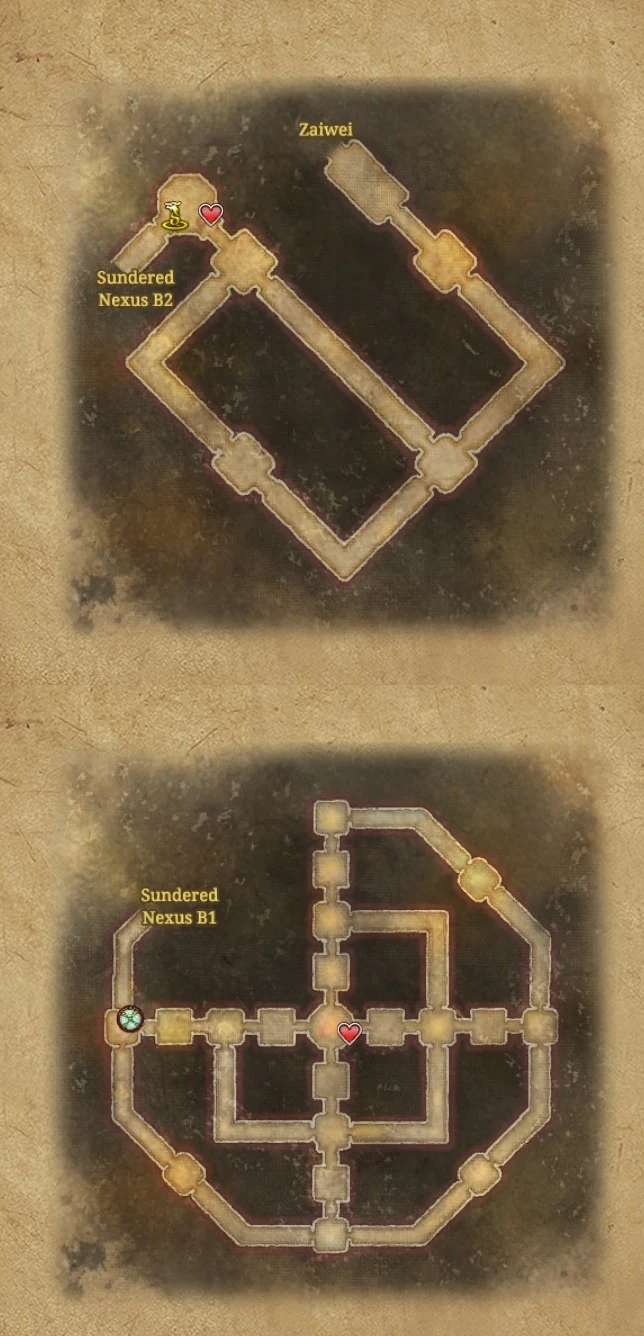
The first maze room will always be at the square room before room with the Dragonblood icons (check B1 map) but for the remainder of the maze rooms, they will be indicated by their square shape on the minimap (check B2 minimap). Players must fly down to the bottom of the maze via the gaps within the sides or center. The pattern of each maze are always fixed to that specific maze so once you memorize the pattern, it should be easy to remember how to get down to the bottom.
Upon entering the doorway to the maze, a 30 second countdown will begin before a treasure chest at the bottom of the maze disappears so the party should wait for all members to be out of combat and/or have enough stamina to glide down. The first (and only) maze in B1 will only have a Naryu coin or nothing at all in the chest. The succeeding maze treasure chests will have chances to drop more than 1 Sundered Nexus piece (10 pieces make a chest which can be opened with a Key from the final boss).
Be warned that touching the tiles of the maze before it is disabled from the switch at the bottom will damage (and ultimately kill) you but can be resisted by resist skills, iframes, or HM block.
Key Roulette Room
Key Roulette Room[ | ]
This is the first room of B2 after defeating the Drill Sergeant. There are 4 colored guns to choose from with a spinning wheel on the other side to show the spun color character at random. One party member will choose a color and activate the lever next to the guns which will spin the wheel. If the color of the character matches the color of the weapon chosen, the gun will instantly kill the mob spawned and a gateway will open. If the color is wrong, you can choose to spin the wheel again until you get the color of choice or kill the mob by normal means (it has about 3 million hit points). Each spin costs 1 Key. There are 2 gateways in the room and upon killing a mob, either one may open at random. One is the shorter path that goes to the inner circle of rooms whereas the other path will take the outer most ring of rooms. If you get the long path, you can pick another colored gun and spin the wheel again to open the shorter path (and vice versa).
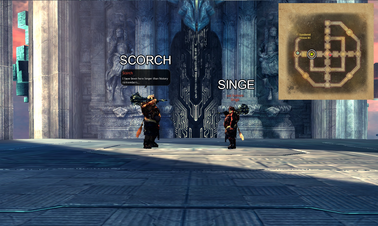
Scorch & Singe Room[ | ]

Scorch & Singe
Scorch & Singe will probably be the most difficult mobs to handle as they perform large AOE's. The trick to completing this room with minimal casualties is to have double CC's specced on all party members. Scorch and Singe are always vulnerable to CC so when they are about to perform their AOE skills, use them to interrupt it. Singe is the shorter of the two and will always and say, "Flames, come to me!" before he does his large DoT AOE (however his first AOE attack will not have any dialogue so a double CC from the start is advised. Scorch does not say anything but if you see two flaming orbs appear around him, that's when he's about to do his large explosion AOE. Scorch also has an additional attack where he rains fireballs from the sky (like Hae Mujin's Barrage) which can be dodged easily but players may wish to CC that if they experience frame rate lag.
Between their AOE's, their normal attacks are AOE swipes and spins.
After killing both of them, either of the two gateways will open at random - one being a long path with simple mobs and one being a short maze path to the final boss room.

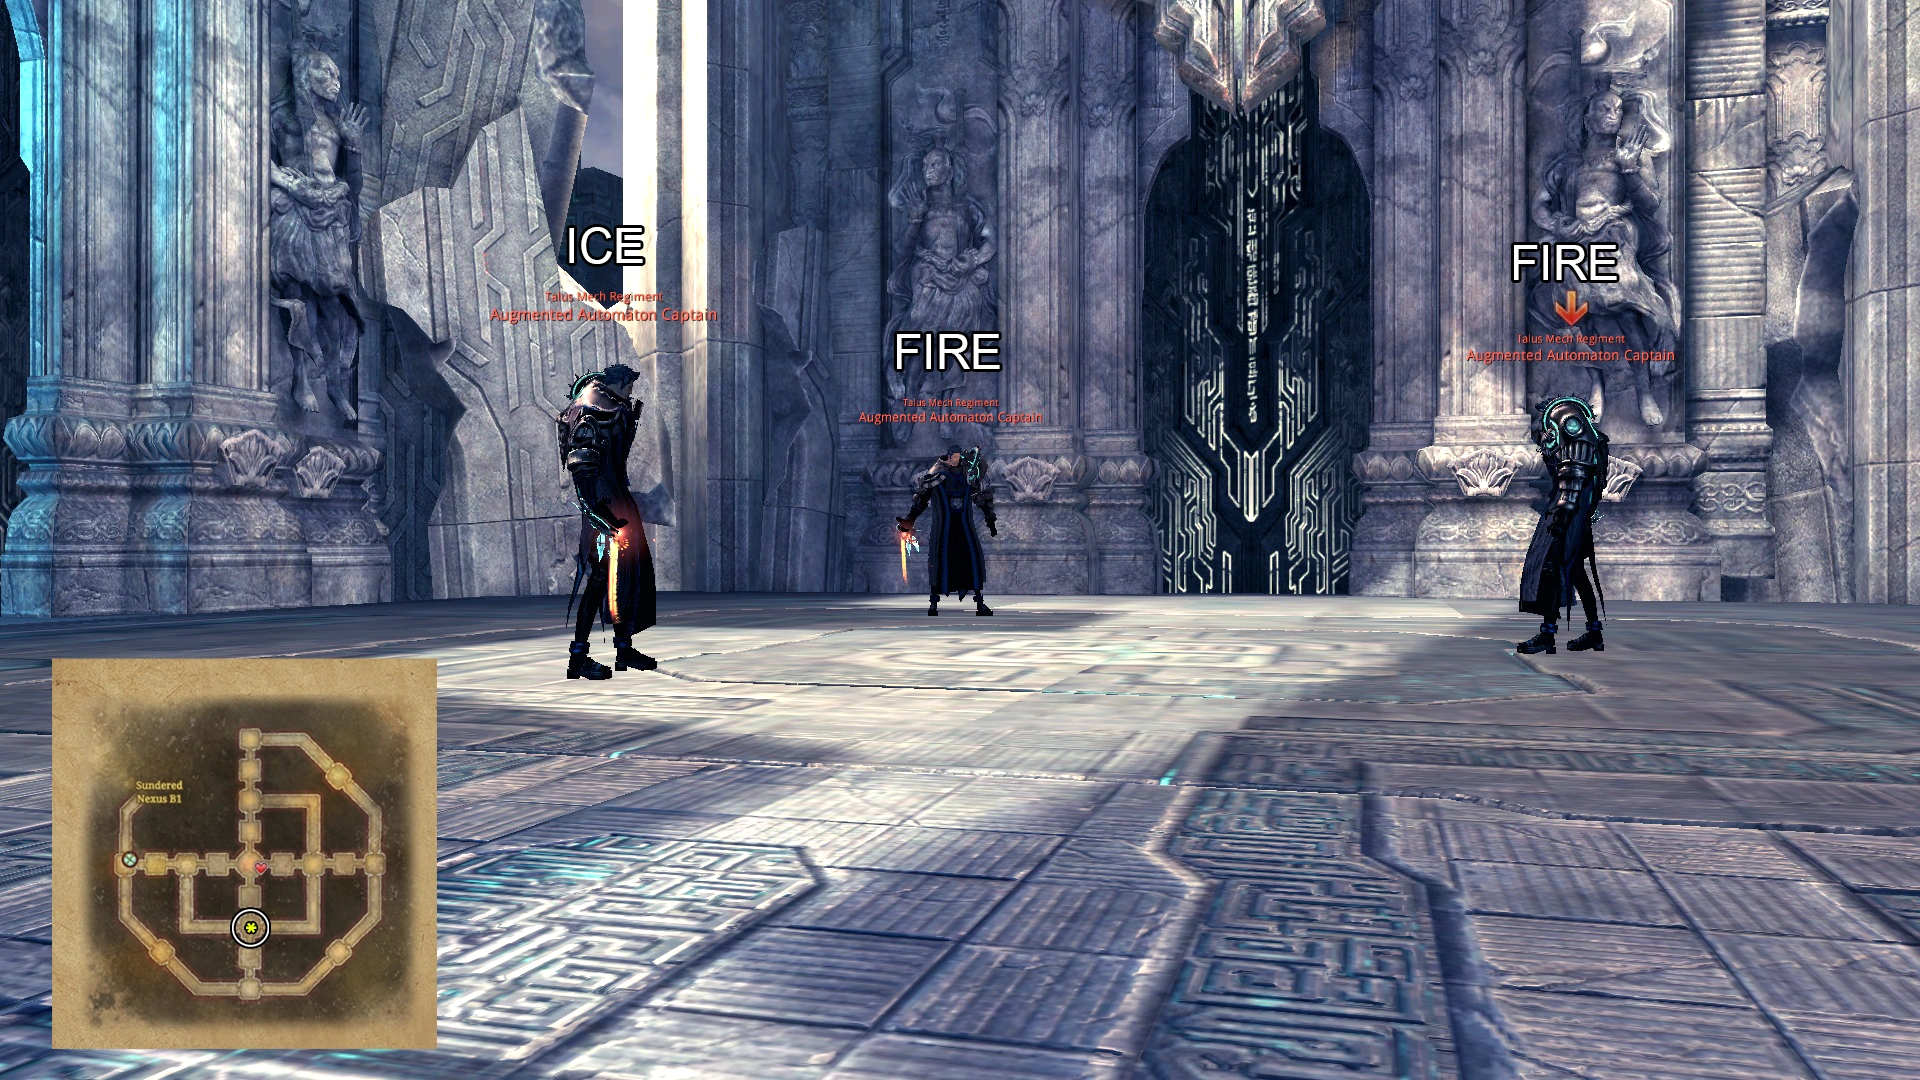
Ice & Fire
Ice & Fire Room[ | ]
If you get the long path after Scorch and Singe, you will reach this room. It has 3 mobs and they will always have the same element for each dungeon run. Attack either of the Fire mobs first and ensure that every party member is within the elemental circle or they will take damage from the projectiles. The reason for entering either fire domes first is because all 3 mobs start with Fire attacks and the fire domes protect against fire attacks hence none of the attacks will damage you while inside. Once clearing the first fire mob, move into the second fire circle and kill the mob. Leave the ice mob for last because his blue ice dome only protects you from ice attacks (which none of them have at that time) so you'll take damage from him. If you do not kill the last ice mob in time, he will change to Ice Fury (ice attacks) and his dome will change to red (flame shield) which results in no protection from his attacks. Normally the party should not have any difficulty in clearing out the 2nd last or last mob.
After defeating them, either gateway will open at random - either a short maze path to the final boss or another long path with mobs.
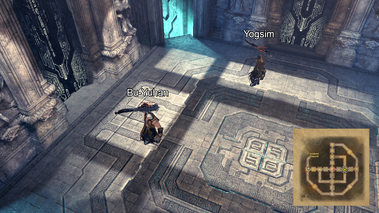
Bu-Yuhan and Yogsim Room[ | ]

Bu-Yuhan & Yogsim
Whoever you attack first will be the "vulnerable" mob. The other mob (either Bu-Yuhan or Yogsim) will gain an invulnerable shield that prevents him from being damaged but will assist in battle. It is advised to have a party member lure the invulnerable mob away first while the rest of the party kills the vulnerable mob. Once the non-shielded mob dies, the other will continue his attack pattern until he charges up his long AOE (eg. Blackram Narrows Gubong Roar) and on-screen text will display, "'name-of-mob' is preparing to cast Chi Ravage". Once his AOE is cast, on-screen text will display, "'name-of-mob' has cast Chi Ravage' and his shield will disappear.
Both mobs have fairly simple attack rotations but they do have grabs so CC's are advisable if a party member gets grabbed.
After killing both of them, either gateway will open at random - either a short maze path to the final boss or another long path with mobs.

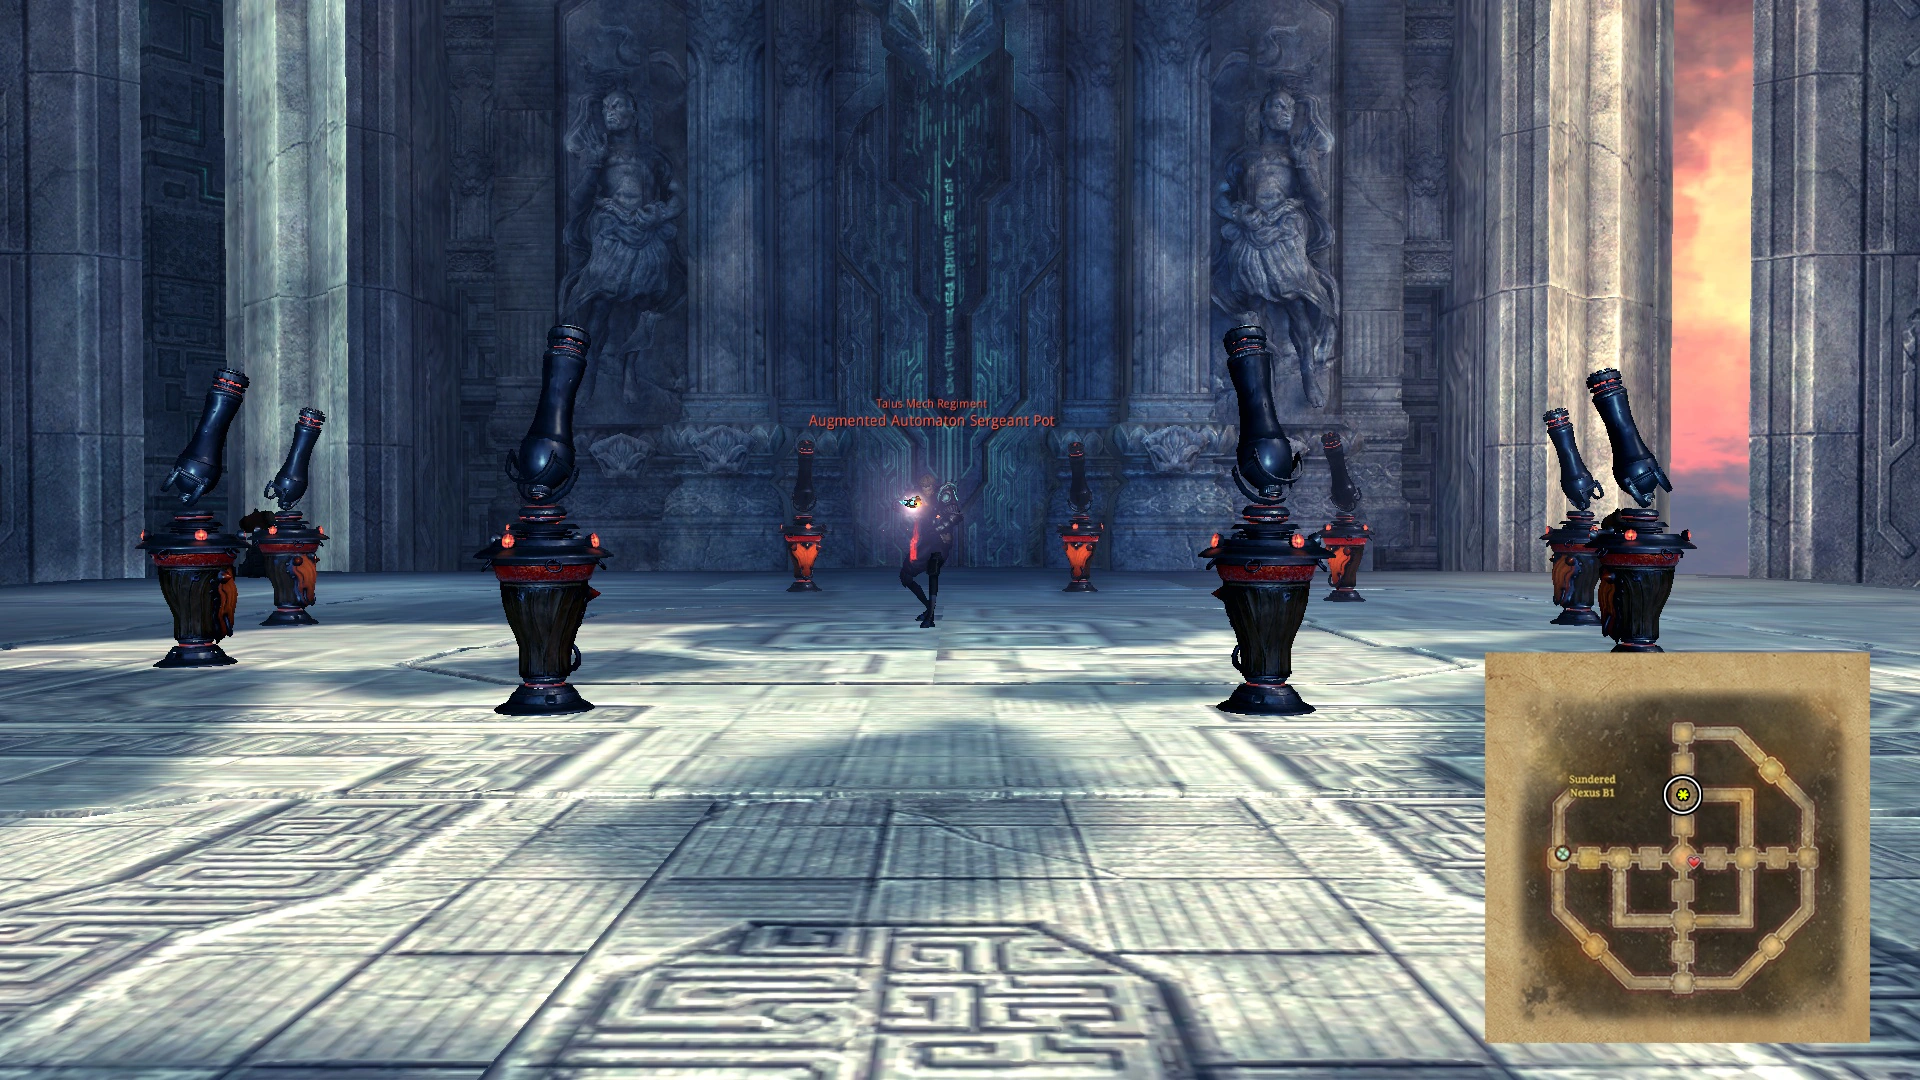
Sergeant Pot
Whack-a-Mole Room[ | ]
This room has a mob in the center with auto-turrets surrounding it. There are 4 hammers in each corner of the room and only one party member should be on "mole duty" while the rest of the party kills the mob. The "moles (turrets)" only pop up after awhile so it is possible for a party to focus down the mob even before the turrets spawn (or are able to do enough damage to kill you). If the turrets do pop up, the party member with the hammer should whack it and it will go back down.
The mob does projectile attacks similar to those of the Bull-Room.
This is the last room for the inner circle and the next room will be a maze room which leads to the final boss.
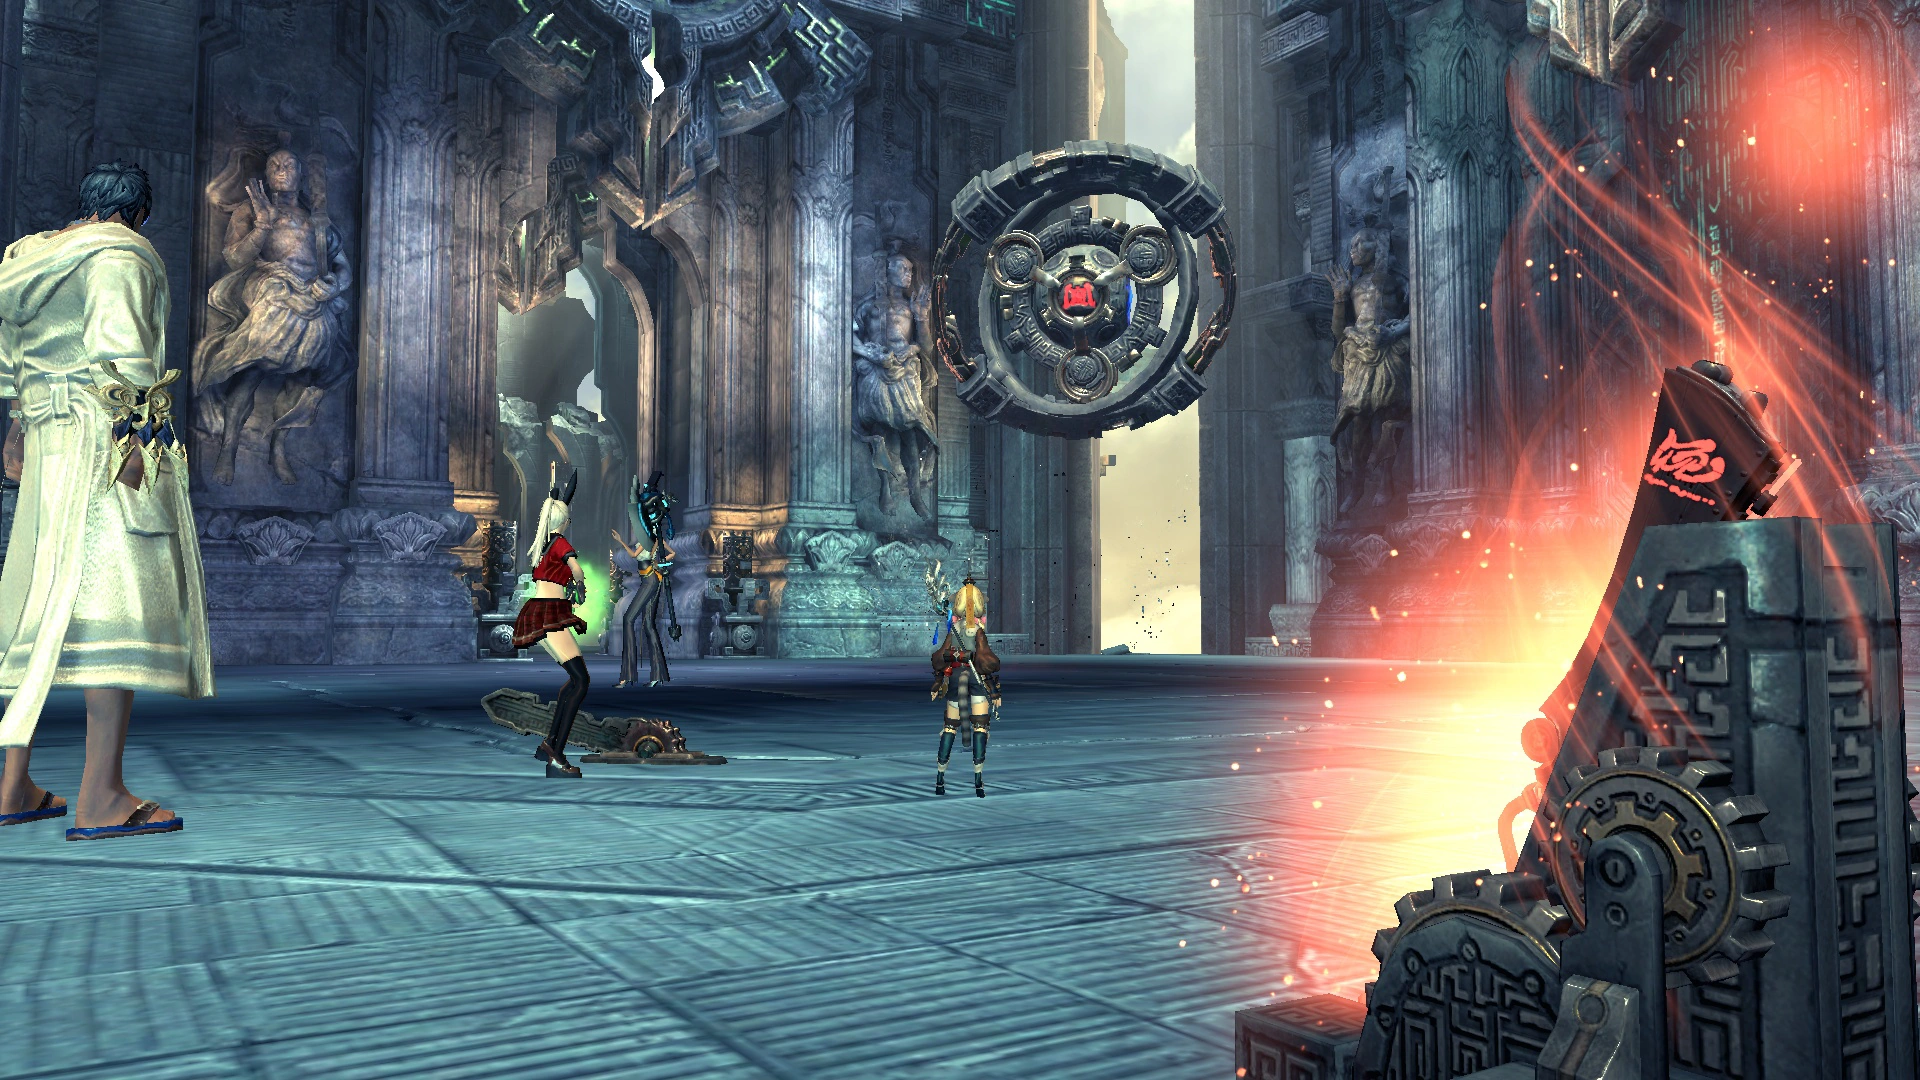
Excavator Type-09 (Boss Room)[ | ]

Excavator Type-09
This is the "mini" boss before the final boss, much like Naryu Labyrinth. If you engaged with him during the long pathways of the other rooms he has the same attack pattern. Spin > Laser Beam > Spin. After 3 rotations of this he will move to the center of the room and summon turrets. The turrets will shoot rockets at the player with aggro but they can be blocked normally or with projectile blocks. If a ranged player has aggro this boss may start spin charging across the room until it gets blocked.
Once he is destroyed, the Final Boss cutscene will start to play. Other players are advised to move back to the edges of the room before the final boss so as not to accidentally aggro him (players watching the cutscene will have enough time to move away before the final boss spawns).
Bosses[ | ]

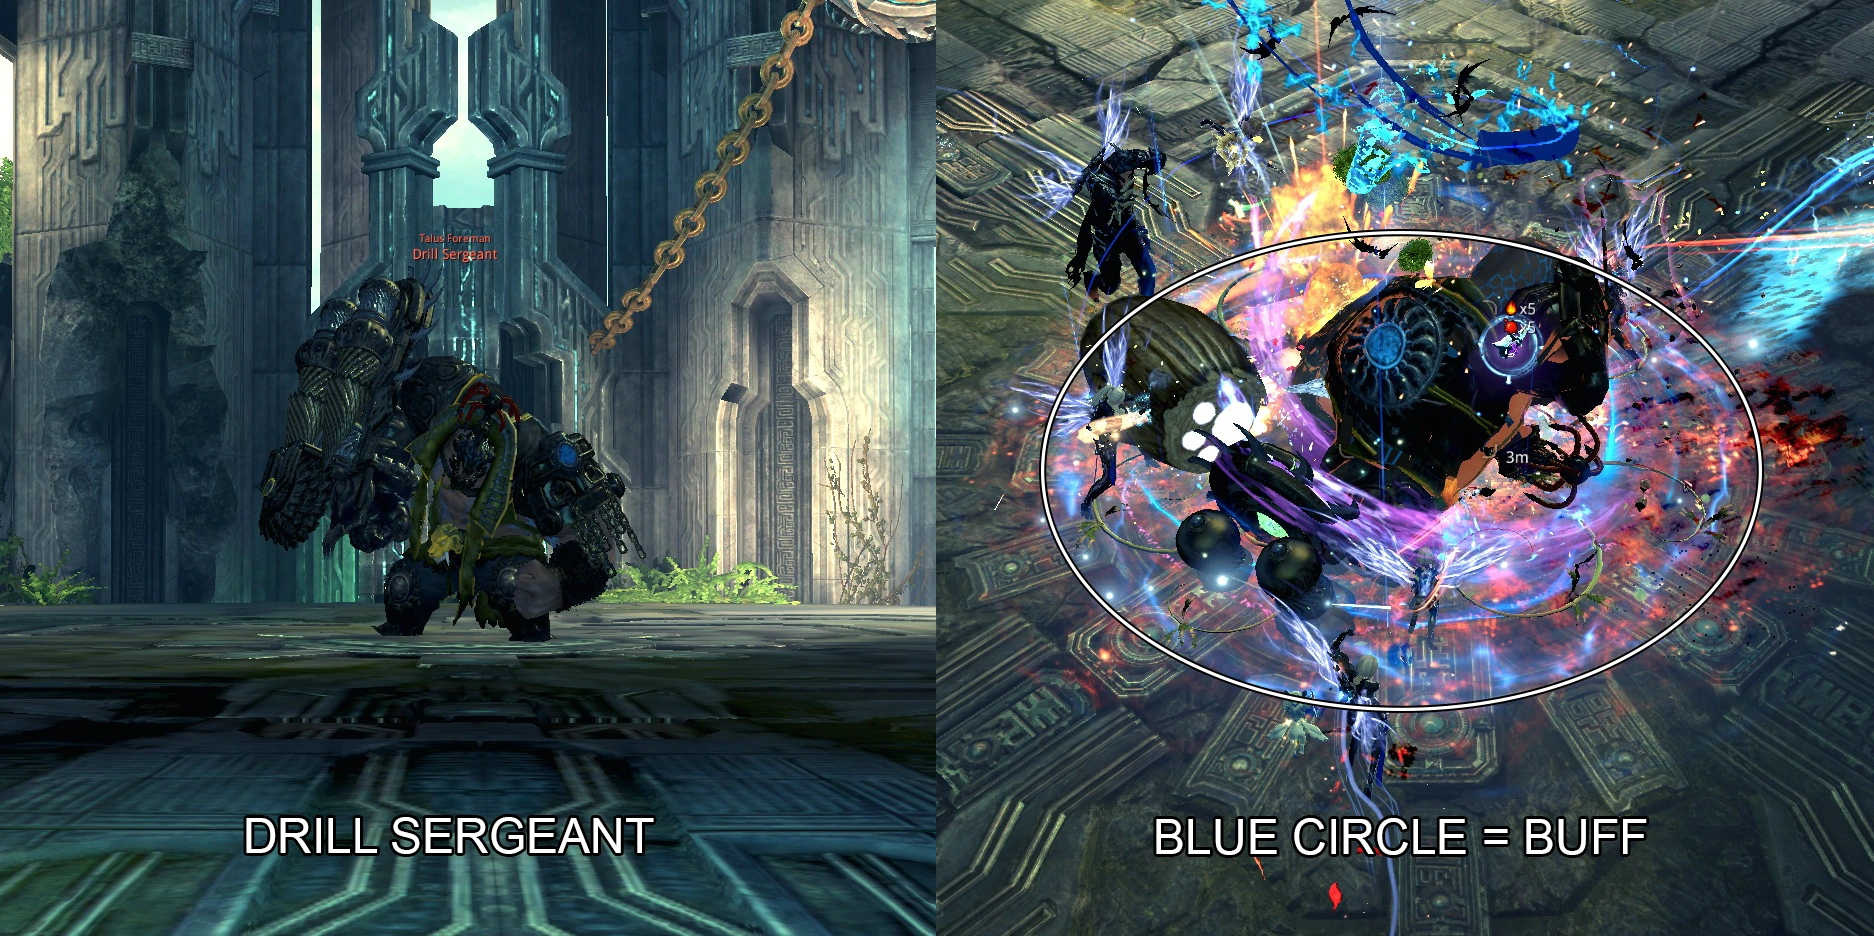
Left: Drill Sergeant, Right: The Blue Buff once he is incapacitated.
The following will cover the mechanics for the 2 main bosses of Sundered Nexus.
Drill Sergeant (Mini-Boss)[ | ]
This is the first mini-boss waiting at the end of the first maze of the dungeon. For this boss the party needs to have double CC's on Knockdown, Stun, and Daze. It's useful to make sure which party member uses which CC before the fight starts to prevent confusion in the fight. (e.g. Blade Dancer could do all 3 CCs by himself). A class that can block easily (such as Blade Master/Kung Fu Master/Warlock) would help as well but is not necessary as every class owns one block (might just not be as spammable).
Attack rotation for melee tanks:
- Swipe (small rectangular AOE)
- Long Drill Hold (Large Rectangular AOE which does laceration (high damage bleed effect))
- Triple Jump (larger AOE per jump)
- Swipe
- Long Drill Hold
- Forward Charge (must be blocked or he will charge forward)
If a ranged takes aggro that is too far for him to hit, he will throw mini chainsaws at every party member, these can be iframed and people can be protected by anti-ranged attack shield (e.g. petal storm (summoner)). AOE bombs will be shot out after the mini saws if the aggro'ed player is still too far. After a few attack rotations, he will roar, gain a 90% damage reduction shield, and enter another phase that starts with him casting 2 chainsaws at one of the party members (on screen text will say: Drill Sergeant uses his power to conjure a huge saw). For that the whole party should gather behind one of the block-classes. Both saws only need to be blocked once. After being blocked, they will stay spinning in position (will cause damage if stepped in) but the rest of the party is free to move around. If the party fails to block the 2 saws, they will fly through the entire area hitting the party member and applying Bleed on them (they will continue to fly all over the area unless blocked). After the 2 saws are shot out, the boss will jump into the middle to charge up his shield (warning: there is a DoT - Damage over Time AOE under his drill while charging). Wait for the on-screen text to show which double CC needs to be used to interrupt the charging. The order of the CCs is always random. If melee classes are performing the CC's, they should run in, CC, then back out or they will take damage from the center drill (HM block / resist skills will prevent this).
Once all 3 double CC's have been done correctly, it will trigger a Power Surge and cause the Drill Sergeant to explode and lose his shield (do not approach him until he has exploded as you still take damage from his center AOE and explosion). The Drill Sergeant will then be incapacitated for approximately 20 seconds and will generate a blue circle buff (+50% Focus Recovery, +80% Crit Damage, and +200% Attack Power) in his close vicinity (ranged classes should move in at this time to take advantage of this buff). Grabs, Cat Grapples or Knock-ups should not be used during this time or it will cause the Drill Sergeant to stand back up almost immediately and start his attack rotation (however they can be used at the end of the 20 seconds to extend the time).
If the CC's are done wrongly (eg. someone does a daze instead of a stun) or they are not done in time, on-screen text will display "The Drill Sergeant is Fully Charged". At this point, he will suck in (and create) more saws, which will be shot out all over the area. His 90% damage reduction shield will stay and once all the saws are shot out, he will return to his normal attack rotation. He is technically invulnerable until he does his roar again (to perform his double saw shoot-out + middle charging) and will only lose his shield once the CC's are done right.
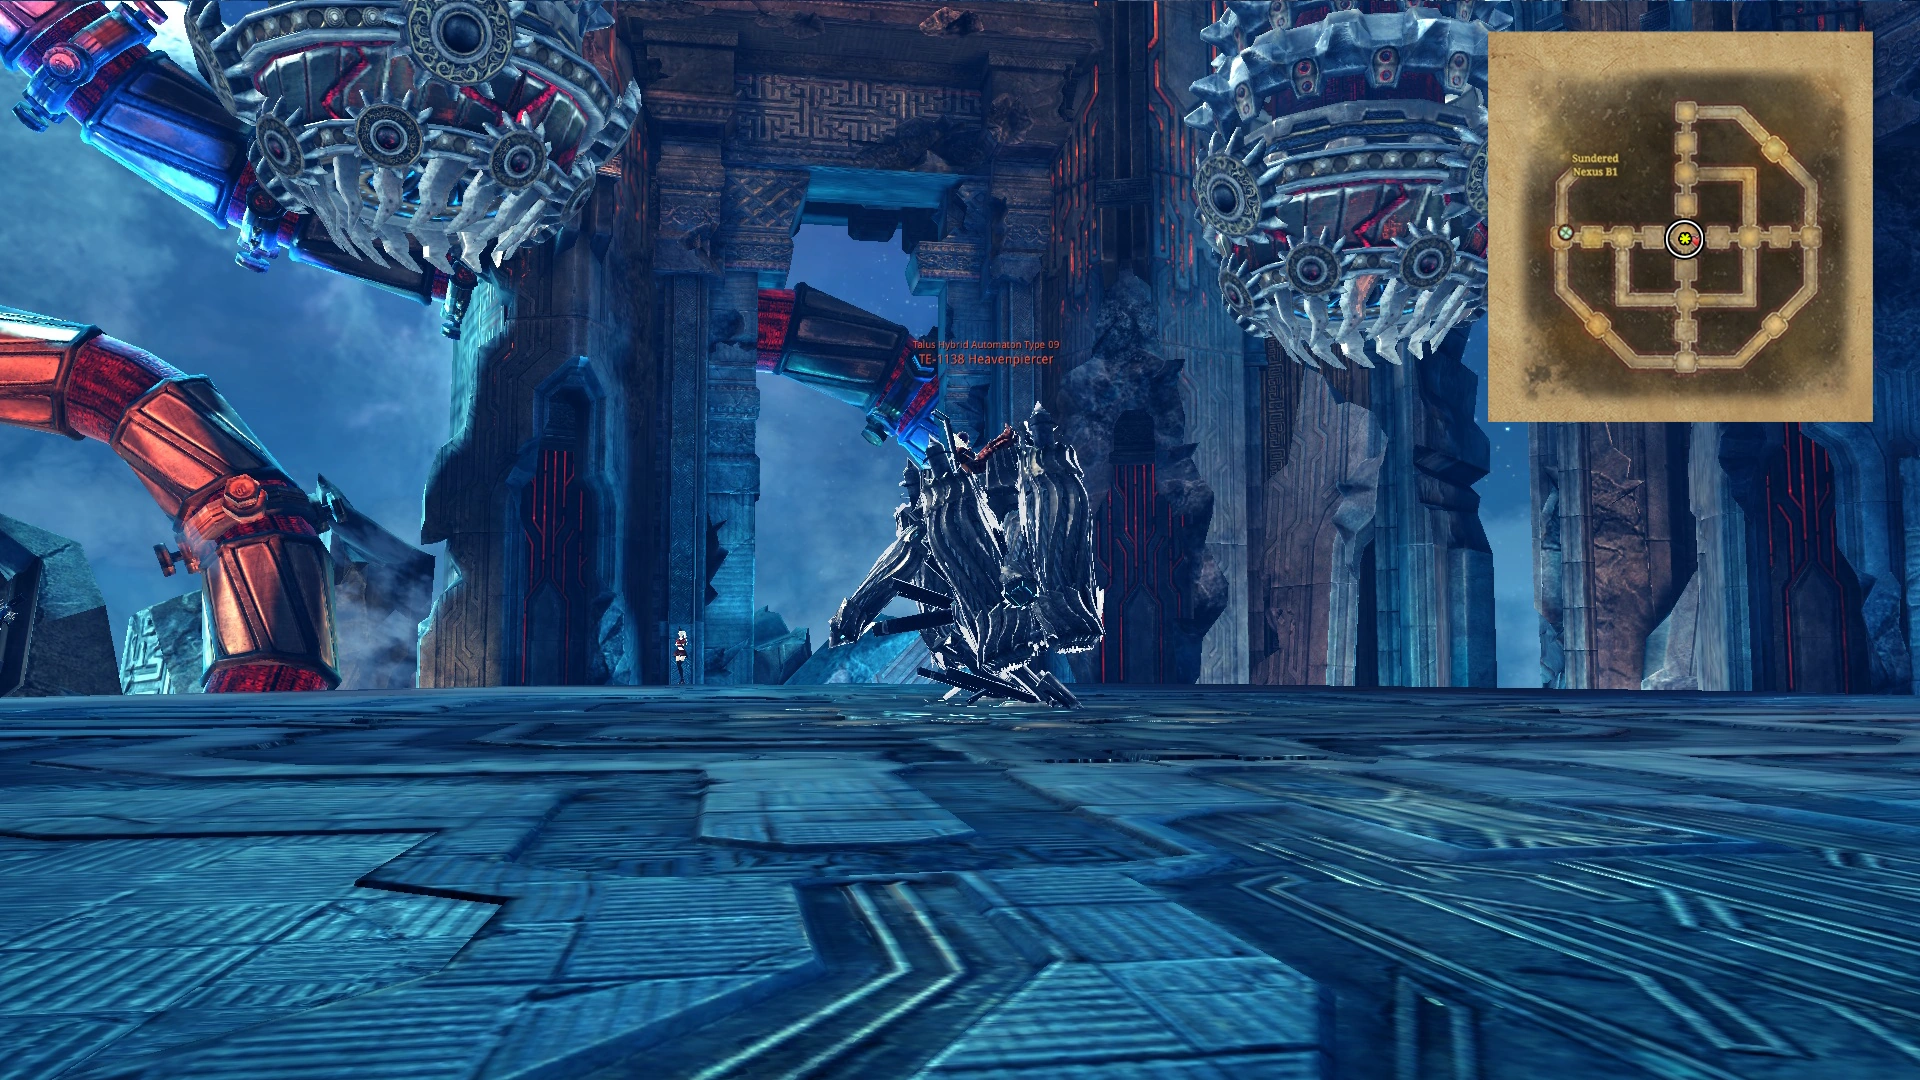
TE-1138 Heavenpiercer (Boss)[ | ]
TE-1138 Heavenpiercer
This is the final boss for Sundered Nexus.
His melee attack patterns are (not in order):
- Front Jab
- Swipe
- Frontal Drill Spam
- Laser Beam
- 360 Degree Spin (can be CC'ed)
- Floating Spin with fire DoT Circle (when low HP)
- Fast Frontal Swipe (when low HP)
Ranged Attacks:
- Laser Beam
- Leaping Slam

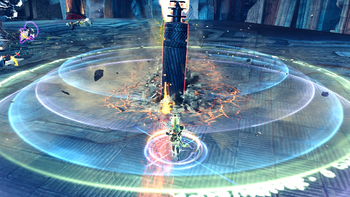
Blue "Target" Indicator under Player
At 90% he will start his first drill phase. On-screen text will display, "TE-1138 Heavenpiercer is ready to launch the Drills" and the boss will target the player furthest away from him (a flashing blue indicator will appear under the feet of the targeted player). It is recommended to have a ranged class be the "target" as they will be able to attack while moving and usually stand a fair distance away from the boss. Once the drills are fired, the "target" should move backwards in a line (or U shape depending on the type of AOE skills/attacks your party has) to allow easier clearing.The "target" will take damage from walking backwards due to the drills landing "on" them but it is a very small amount. Once the drills have landed, it is advised for the party members (other than the tank) to destroy the drills. If they are not destroyed, any drills caught in his following yellow AOE will explode - any more than 3 drills exploding will result in an Earthquake, resulting in a party wipe.
The targeted player should never stand still as drills which are stacked on top of each other will result in a party wipe earthquake.
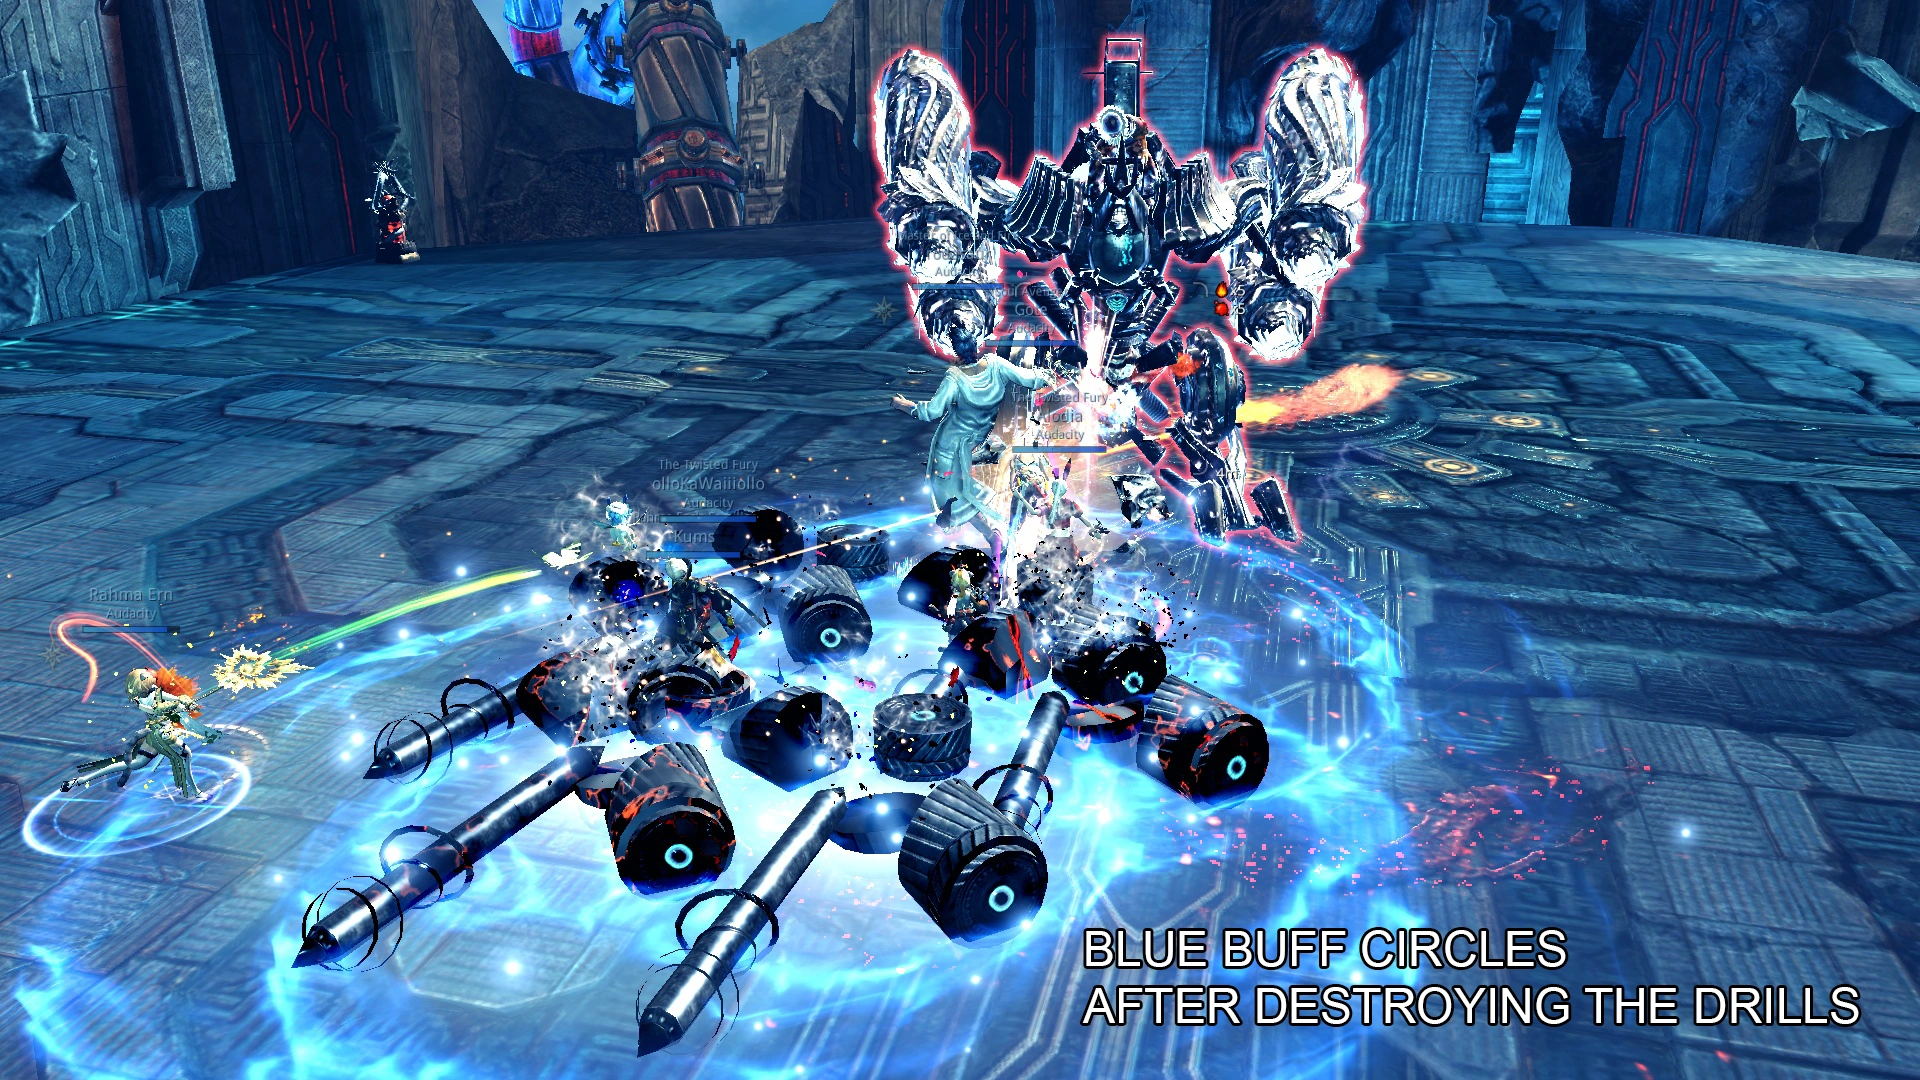
Destroying the drills will also create blue pools which give damage buffs but will only last for 10 seconds so it is recommended to have ranged characters stand in the pools while attacking the boss and having the tank position the boss (or via a CC + grab) near the circles.
*Note for the tank / aggro: After the drills are launched, the boss will change into a charge attack which you can either block on the spot or let him pass through which bounces him back from the edge of the arena back to you (if you wish to position him near the circle buffs or give more time for teammates to clear drills). However if you are in a high AP party, his forward charge phase may be skipped and he will go straight to his AOE attacks.
At 50%, on-screen text will say, "TE-1138 uses Earthquake of Wrath" which is a 3x area wide staggered AOE (like Yeti Ice Cruxes) but can be resisted by iframes, resist skills, or HM block. After the Earthquake, the boss will enter his drill phase once again.
- Drill Phases: 90%, 70%, 50%, 30% & 10% (% in Bold are done after his Earthquake of Wrath)
- Earthquake of Wrath: 50%, 30%, 10%
If the tank or aggro lets the boss charge after the drills to bounce back from the edge of the arena, it is advisable not to attack the boss because if 10% of his HP is taken out before he finishes charging, he will stick to the edge of the wall he runs into and start his AOE attacks there (eg. after 70% drills, if his HP reaches 60% before he "bounces" off the wall to come back to the tank, he will stay at the wall he runs in to).

"Blue Buff Circles" after destroying drills.
After drills are casted and the charge has been blocked (or skipped), the boss will start 3x AOE attacks, each with a bigger AOE range per hit. After his first 3 AOE's, a 2nd set of 3x AOE attacks will start - with the addition of small robot adds that will appear from the corners of the room. These small adds will move in towards the boss are normally destroyed by his own AOE (Charge Type 108) but adds with the name prefix "Zapper Type 118" will stay out of the range of the AOE circle. Ranged players should focus down Zapper outlier adds if they are seen hanging outside the AOE circle as they will charge the boss for his Heavenpiercer attack. Once the boss reaches 6 stages of this charge, he will enrage and wipe the party.
CC's should not be used during the spawning of the smaller robot adds or they will delay the AOE, allowing them to charge his Heavenpiercer.
At low HP (around 30% or less), the boss will gain a "Power Surge" shield which gives him 90% damage reduction. This will only happen after drill launching and the on-screen text will display, "TT-1138 Heavenpiercer has a Power Surge". At this point, the Boss will need to absorb at least 3 of the blue buff circles which are created from destroying the drills in order to recover from the power surge. The Boss will charge at the tank / aggro like normal after this notice so the tank should position himself deep within the blue puddles before blocking so the boss can absorb the circles. If the party fails to let him absorb at least 3 of the circles, the boss will retain his 90% damage reduction shield for an extended period of time unless he overcharges himself and loses his shield (yet to be discovered how to trigger this).
Once TT-1138 is destroyed, Be Ido will spawn as a quick boss to finish off.
Encounters[ | ]
| Bosses | Level | HP | Monsters |
|---|---|---|---|
| Chief Investigator | 50 HM2 | up to 3,360,000 |
|
| Drill Sergeant | 50 HM2 | 7,326,000 |
|
| Excavator Type 09 | 51 HM2 | 1,200,000 |
|
| TE-1138 Heavenpiercer | 51 HM2 | 10,433,375 |
|
| Be Ido | 51 HM2 | 288,000 |
|
Loot[ | ]
Drops[ | ]
| 6-man Version | 4-man Version Only |
| Sealed Be Ido Soulshield | Psy-Ops Visor |
| Sealed Be Ido Earring | Thruster 27 |
| Sundered Nexus Key | Locked Be Ido's Phantom Weapon |
| Sundered Nexus Piece | The Lost Hongmoon Secret Technique - Volume 3, Chapter 1 |
| Frozen Stinger | |
| Honorary Ornament | |
| Sealed Flower of Lament | |
| Blue Penguin Pet |
Expired Be Ido 6/4-Member Treasure[ | ]
| 1-2 Sundered nexus Piece |
| Extravagant Fragment Pouch |
| Stylish Fragment Pouch |
| Gem Hammer |
| Naryu Tablet |
| Sealed Alpine Belt |
| Sealed Alpine Bracelet |
| Sealed Alpine Earring |
| Sealed Alpine Necklace |
| Sealed Alpine Ring |
| Sealed Be Ido Earring |
| Sealed Be Ido Soul Shield 5-8 |
| Sundered Nexus Key |
| Sundered Nexus Piece |
Lost Operator 6/4-Member Treasure[ | ]
| Extravagant Fragment Pouch |
| Stylish Fragment Pouch |
| Gem Hammer |
| Naryu Tablet |
| Sealed Alpine Belt |
| Sealed Alpine Bracelet |
| Sealed Alpine Earring |
| Sealed Alpine Necklace |
| Sealed Alpine Ring |
| Sealed Be Ido Earring |
| Sealed Be Ido Soul Shield 1-4 |
| Sundered Nexus Piece |
Sundered Nexus Chest[ | ]
| Frozen Stinger |
| Naryu Coin |
| 100 Honorary Ornament Bundle |
| Honorary Ornament |
| 100 Frozen Stinger Bundle |
| 10 Frozen Stinger Bundle |
| Extravagant Fragment Pouch |
| Stylish Fragment Pouch |
| Naryu Tablet |
| Ghost in the Shell |
Gallery[ | ]
| Sundered Nexus' Guide |
|---|